How to install cuda on Ubuntu 18.04 and run Tensorflow and Pytorch
CUDA Tensorflow Linux
We will go through several stages, like installing cuda-9.0, cudnn and tensorflow cpu and tensorflow GPU versions. Finally, we will install pytorch with cuda-9.0. Quoting Black Widow in Marvel movie, “I am fighting this war so you don’t have to”.
Last night, April 29th, 2018, I successfully installed Tensorflow on Ubuntu 18.04. However, the key to install Tensorflow is to correctly install Cuda and cuDNN library, since last night Tensorflow complied run file only support cuda-9.0. So please if this blog is out of date.
Before we install Cuda-9.0, you may want to change ubuntu mirror source website to whichever is closet to you. I changed it into the mirro.ustc.edu.cn since I am in Hefei, Anhui, China. Just search software&update in Show Application Page, since the system setting doesn’t include this item like 16.04. Then please change the GPU diver to be 390 version tested by Nvidia.
## Install Cuda-9.0 checking[Tensorflow website](https://www.tensorflow.org/install/install_linux), we know that we have to install cuda9.0 first as dependency for the Tensorflow advantage. First google cuda-9.0,. and choose linux, then Ubuntu-16.04 and finally download the [runfile](https://developer.nvidia.com/cuda-90-download-archive?target_os=Linux&target_arch=x86_64&target_distro=Ubuntu&target_version=1604&target_type=runfilelocal), which is 1.6GB but can be downloaded very fast.
Before we get into the runfile, we need to install some dependencies, otherwise, you will get “Missing recommended library” warnings like this.
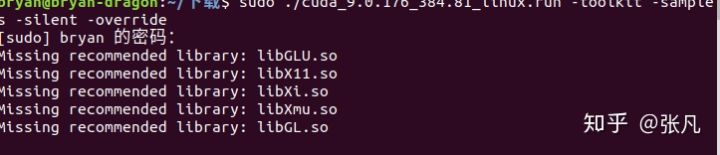
sudo apt-get install freeglut3-dev build-essential libx11-dev libxmu-dev libxi-dev libgl1-mesa-glx libglu1-mesa libglu1-mesa-dev
{% endhighlight %}
Next, let’s we install cuda-9.0 like this
{% highlight shell %}
sudo chmod 777 *.runfile # give permission to run all the runfile files sudo ./cuda_9.0.176_384.81_linux.run -toolkit -samples -silent -override # {% endhighlight %}
Then cuda-9.0 is installed on the this path /usr/local/cuda-9.0. To avoid missing libray error, we create a symbolic link “cuda” in this directory for cuda-9.0 {% highlight shell %} cd /usr/local sudo ln -s /usr/local/cuda-9.0 cuda # create the symbolic link {% endhighlight %}
Before the verify our installation of cuda-9.0, we will lower our gcc version Otherwise we will get “gcc later than 6 is not supported error” like this.

Checking this and the gcc version on Ubuntun 18.04, we decide to lower our gcc version. {% highlight shell %} gcc —version # check ubuntu 18.04 gcc version, you will find it’s 7.3.0 sudo apt install gcc-5 g++-5 sudo update-alternatives —install /usr/bin/gcc gcc /usr/bin/gcc-5 50 # you will find that message that tells you the gcc-5 is set to be automatic. sudo update-alternatives —install /usr/bin/g++ g++ /usr/bin/g++-5 50 # similiar message as gcc {% endhighlight %}
set the cuda into enviroment variables
{% highlight shell %}
export PATH=/usr/local/cuda-9.1/bin${PATH:+:${PATH}}
export LD_LIBRARY_PATH=/usr/local/cuda-9.1/lib64
${LD_LIBRARY_PATH:+:${LD_LIBRARY_PATH}
{% endhighlight %}
Verify the cuda-9.0 Installation
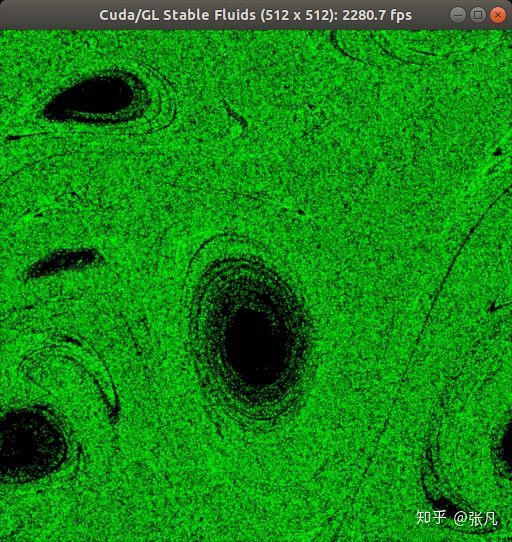
In the same time, we can check that in our home directory, the cuda sample files appears. Let’s build some samples. {% highlight shell %} cd NVIDIA_CUDA-9.0_Samples/5_Simulations/fluidsGL make clean && make ./fluidsGL {% endhighlight %} If Cuda-9.0 is installed correctly, there should be no error message during our making process. And then we can a gorgeous fluid stimulation like this.
So far so good! Our cuda-9.0 is successfully installed! We can have some fun to make some other sample codes before we move on!
## Install cuDNN7.0 Ok! We have had a good time to try out the cuda sample code. Let's install the cuDNN library to accelerate our deep learning algorithms. First register into cuDNN website, if you haven't yet. Agree on the term and click the ["Archived cuDNN Releases"](https://developer.nvidia.com/rdp/cudnn-archive). Click "Download cuDNN v7.0.5 (Dec 5, 2017), for CUDA 9.0" and download three files, the runtime library. developer library, and code samples and user guide, all for Ubuntu 16.04. Go the download directory. By referring [the cuDNN installation guide](http://developer.download.nvidia.com/compute/machine-learning/cudnn/secure/v7.0.5/prod/Doc/cuDNN-Installation-Guide.pdf?510yyrBo9bqx3F6AcnwHaygrC4lBKo50QzFu-ffoA8eaZp0xSW6e6uk2L3oHzEEVaPHm71Wv-UBiNlV7lrwwx7AtsPW_nw1cZs5fUkEn4FNHdGdRIeZfNSwwc0qBfJM-XzwvV9bIaof0KU9KVDGDjyHU8fVAiDuRk2emANigfuynlgbju6MYyPV9DzEjHtqs_g), we can confidently install cuDNN like this. {% highlight shell %} sudo dpkg -i libcudnn7_7.0.5.11-1+cuda9.0_amd64.deb sudo dpkg -i libcudnn7-dev_7.0.5.11-1+cuda9.0_amd64.deb sudo dpkg -i libcudnn7-doc_7.0.5.11-1+cuda9.0_amd64.deb {% endhighlight %}
Install Freeimage
Before we verify cuDNN, we must install the freeimage lilbray first as dependencies for ministCUDNN sample code. Otherwise, we will get error ask us to set Freeimage correctly. {% highlight shell %} sudo apt-get install libfreeimage3 libfreeimage-dev {% endhighlight %}
Verify cuDNN Installations
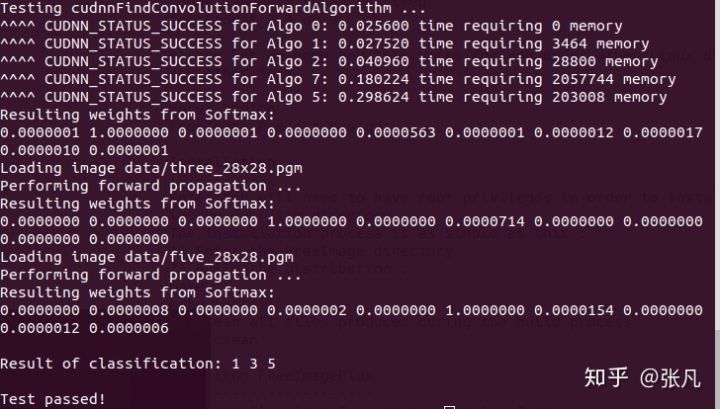
{% highlight shell %} cp -r /usr/src/cudnn_samples_v7/ $HOME cd $HOME/cudnn_samples_v7/mnistCUDNN make clean && make ./mnistCUDNN {% endhighlight %} If everything works, we can get our result ---- “test passed!""
We can try other samples although they may not be impressive as samples before.
## Install Tensorlfow We will use the recommeded installations, which is by [virualenv](https://www.tensorflow.org/install/install_linux). First install libcupti-dev library. {% highlight shell %} sudo apt-get install libcupti-dev export LD_LIBRARY_PATH=$LD_LIBRARY_PATH:/usr/local/cuda/extras/CUPTI/lib64 {% endhighlight %}
Then we will install virtualenv and create a Tensorflow Environment. {% highlight shell %} sudo apt-get install python3-pip python3-dev python-virtualenv virtualenv —system-site-packages -p python3 tensorflow # create a enviroment named tensorflow {% endhighlight %} This will take some time please be patient.
Install Tensorflow CPU version
When the environment is created, we must activate it every time we want to use tensorflow. Let’s first install tensorflow cpu version first as recommended. {% highlight shell %} source ~/tensorflow/bin/activate pip3 install —upgrade tensorflow # install the cpu version {% endhighlight %}
Verify Tensorflow CPU version
In the same tensorflow environment, which means you will see this in your shell. {% highlight shell %} (tensorflow)$ {% endhighlight %}
type python and the following python code. {% highlight shell %} python {% endhighlight %}
{% highlight python %}
Python
import tensorflow as tf hello = tf.constant(‘Hello, TensorFlow!’) sess = tf.Session() print(sess.run(hello)) {% endhighlight %} This is my result. Although it differs with the official verificaiton result, but it works.
>>> print(sess.run(hello))
b'Hello, TensorFlow!'
>>>
Install Tensorflow GPU Version
First, make sure we are in the same tensorflow Enviroment. {% highlight shell %} pip3 install —upgrade tensorflow-gpu {% endhighlight %} However, I am in China. The internet speed speed for downloading the whl file is slow. So I have to use my own download the whl file in browser and pip3 install locally.
Verify Tensorflow GPU version
Still, make sure you are in the Tensorflow Environment.
type python and the following python code. {% highlight shell %} python {% endhighlight %}
{% highlight python %}
Python
import tensorflow as tf hello = tf.constant(‘Hello, TensorFlow!’) sess = tf.Session() print(sess.run(hello)) {% endhighlight %} The result is the same. But we can see our GPU device is working. In my case, you can see GTX 1050 Ti in the test result below.
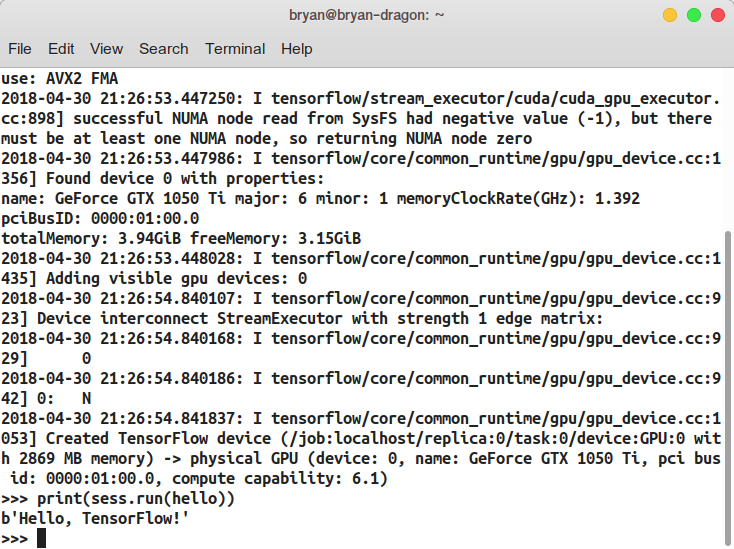
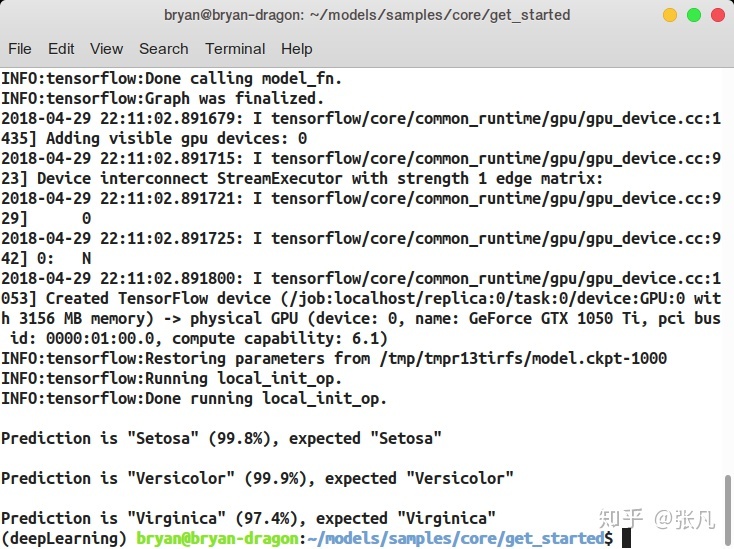
So we have successfully install Tensorflow on Ubuntu 18.04. You can test more and more fun with “Get Started” page on the Tensorflow website. However, I am in China. The Internet speed to git clone the Model repository is hugely slow. So still, I have to use my own way to download the tensorflow Model repository in the browser.
This my fisrt example.
## Install Pytorch We will use Anaconda, the package manager recommended by pytorch to install it.
Install Anaconda
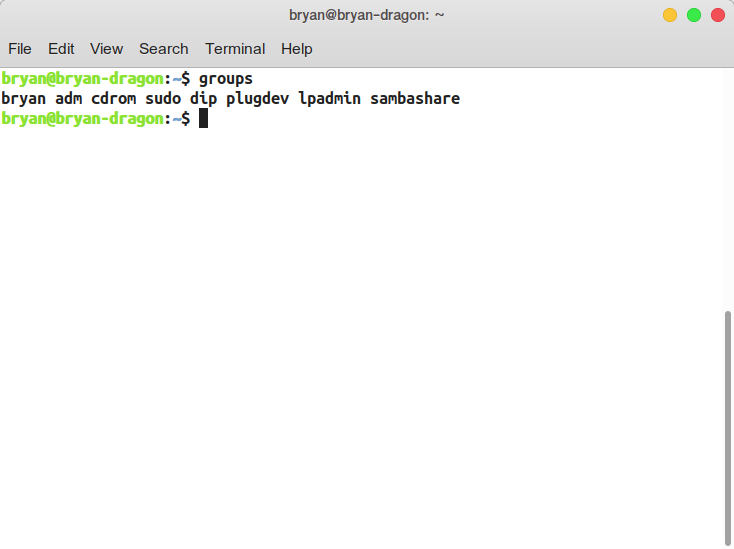
I am in Hefei, China. So I choose mirror.ustc.edu.cn to download the .sh file for anaconda installation. After we have installed the Anaconda. We have to change the owner of the “Anaconda3” to be us otherwise we cannot write a file into this directory. First, we check our username and user group.
{% highlight shell %} groups {% endhighlight %} the first group is usually your group right now. Here is my result.
Change Anaconda Channels
Before we install pytorch we can set the Anaconda mirror source for fewer waiting time. Again, my mirror source is mirror.ustc.edu.cn. Please look for your own ones. {% highlight shell %} conda config —add channels https://mirrors.ustc.edu.cn/anaconda/pkgs/free/ conda config —add channels https://mirrors.ustc.edu.cn/anaconda/pkgs/main/ conda config —set show_channel_urls yes {% endhighlight %} You can replace the website link as any mirror source that suits you.
Install Pytorch
Then we can go to the pytorch website. Choose Linux, python version to be 3.6 and cuda version to be 9.0. Please Hold this command we have {% highlight shell %} conda install pytorch torchvision cuda91 -c pytorch {% endhighlight %} The last pytorch means that we will download the pytorch form its official website, which is hugely slow for me. So replace the last pytorch as the mirror source that suits you and has the pytorch package in the cloud. In my case, the command becomes this. {% highlight shell %} conda install pytorch torchvision cuda91 -c https://mirrors.ustc.edu.cn/anaconda/cloud/pytorch/ {% endhighlight %}
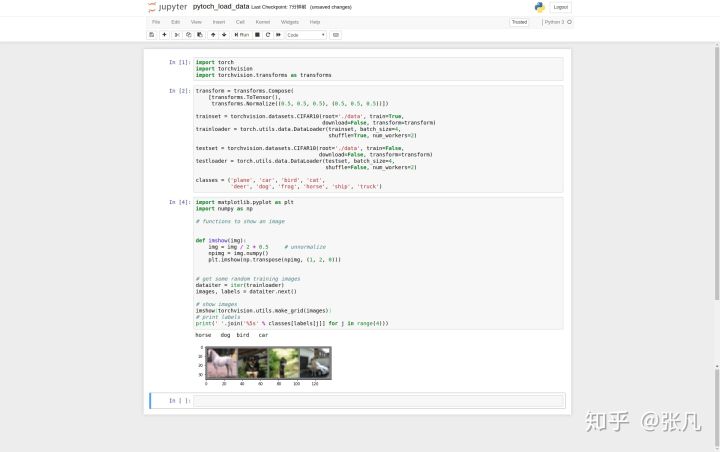
Verify Pytorch
You can try the “Get Started” examples on pytoch webstie. Here is my result.
Finally, We have done it! We have made it! Congratulations to us! If this tutorial has any problems for you, please email to [me](mailto:[email protected])